Usage
Basic usage of the Electric Blocks mod.
This guide assumes you already have a working Electric Blocks mod installation. If not, please go back to the installation guides.
Blocks and Items
Unlike other items in Minecraft, Electric Blocks cannot be crafted using in-game materials (yet). The only way to obtain these blocks is through the creative menu or commands. We recommend that you use creative mode. When you’re in creative mode, press E on your keyboard to open up the block selection menu (this may vary if you have alternative keybindings or control schemes). Then click on the arrow in the top right.
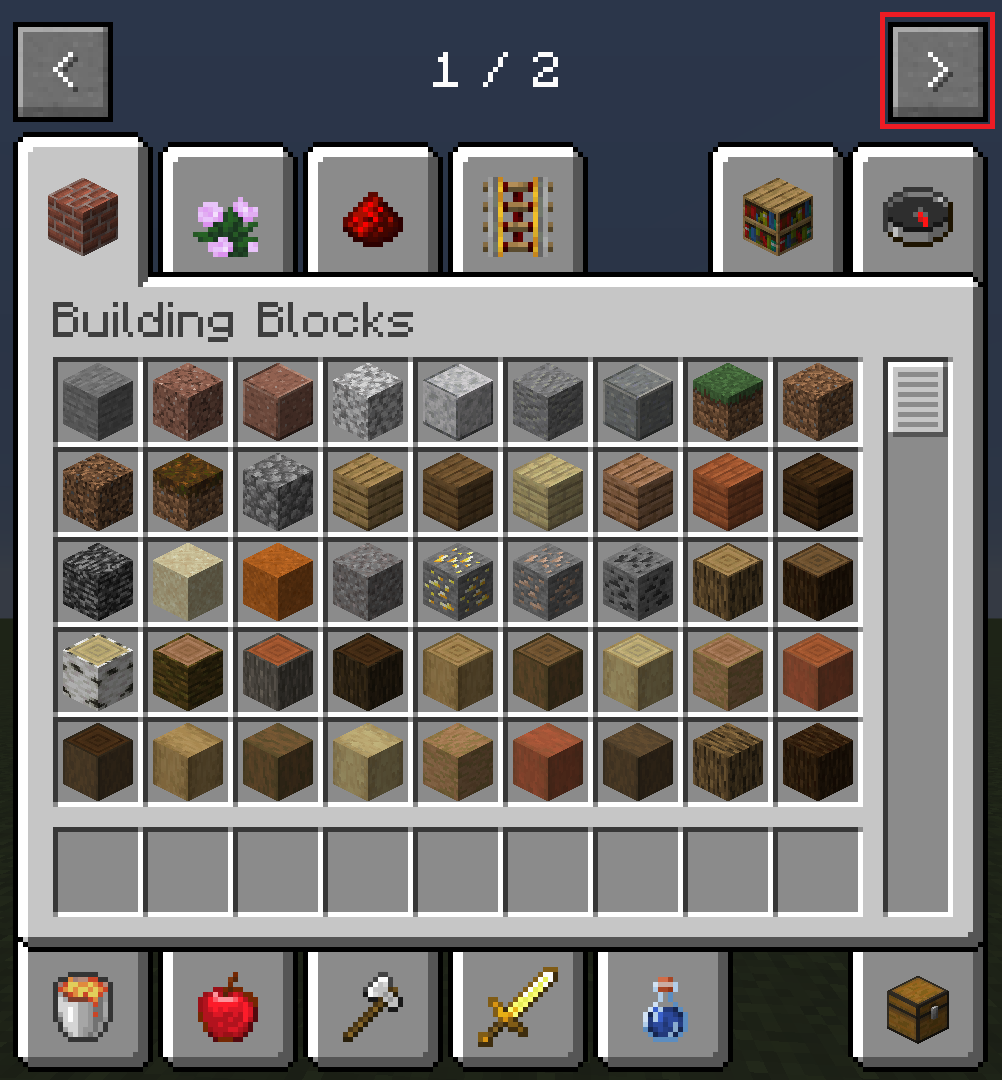
If you have mods other than Electric Blocks installed, you may need to search the other creative tab pages, but eventually you should find a tab that looks like the one marked in this image:
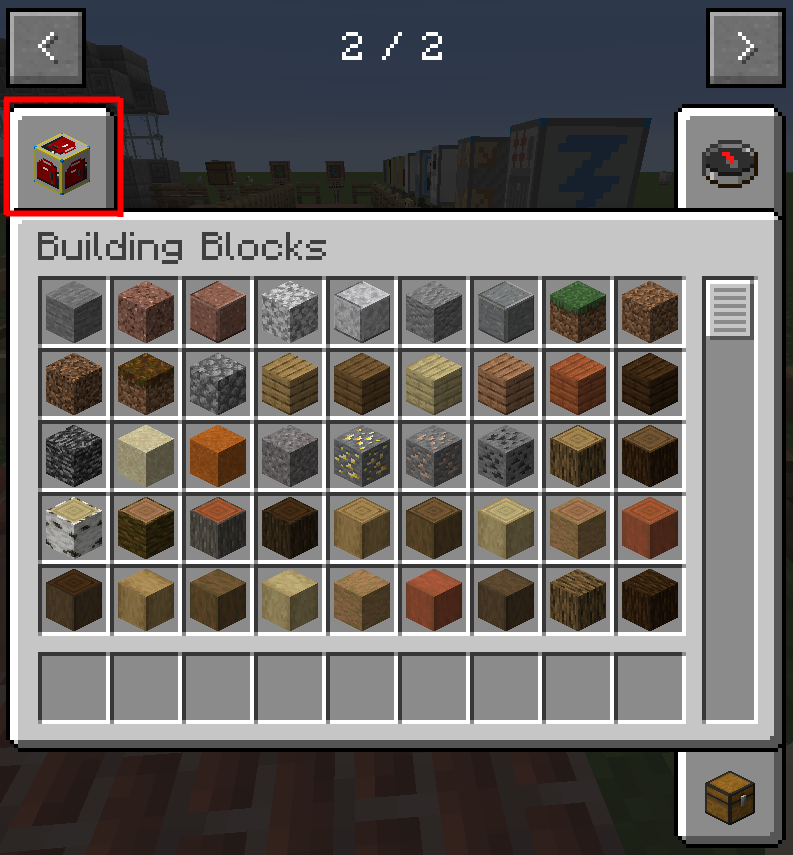
Click on that tab to open it and you should see the menu for all Electric Blocks that looks like this:
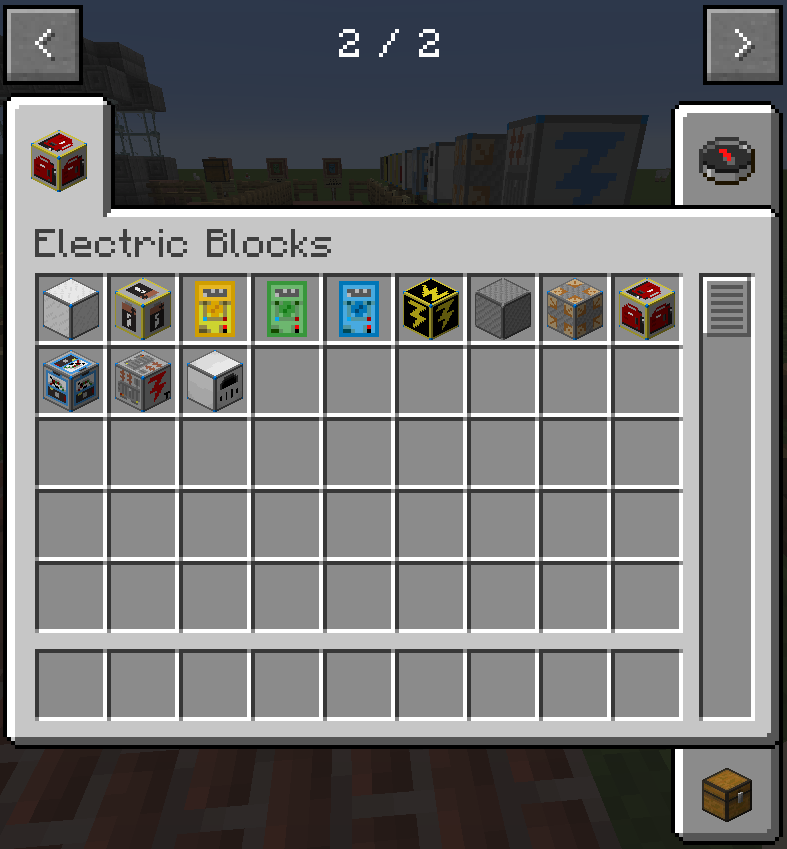
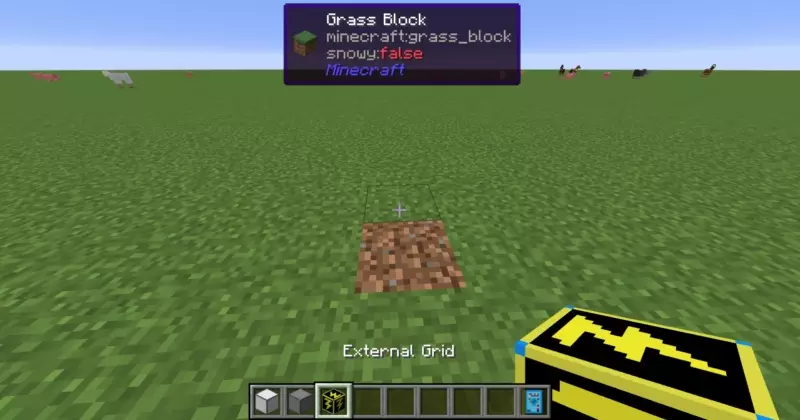
You can drag the blocks from that tab into your inventory hotbar at the bottom of the menu. With the blocks in your inventory, you can build an electrical network in the Minecraft world. Below is an animated GIF showing you how you can create a very simple network consisting of an external grid, several wires, and a lamp block:
Multimeter Tool
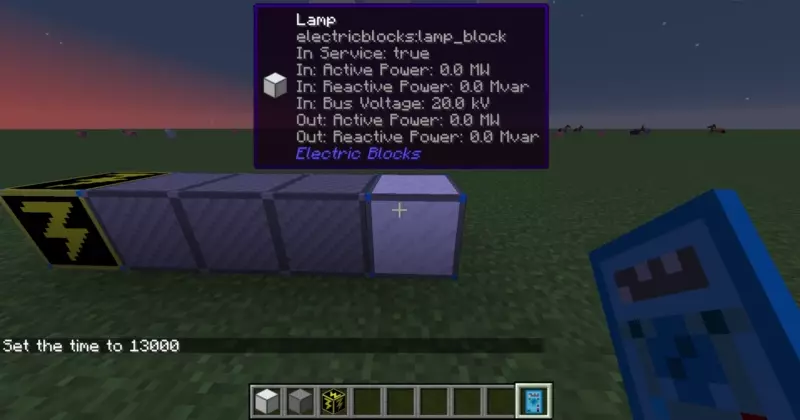
Now you’ve built a network, but to interact with it and run simulations, you’ll need a Multimeter. There are three different Multimeters - Intro, Intermediate, and Advanced - each of which display a certain amount of information for each block. The images below use the Grid block as an example.
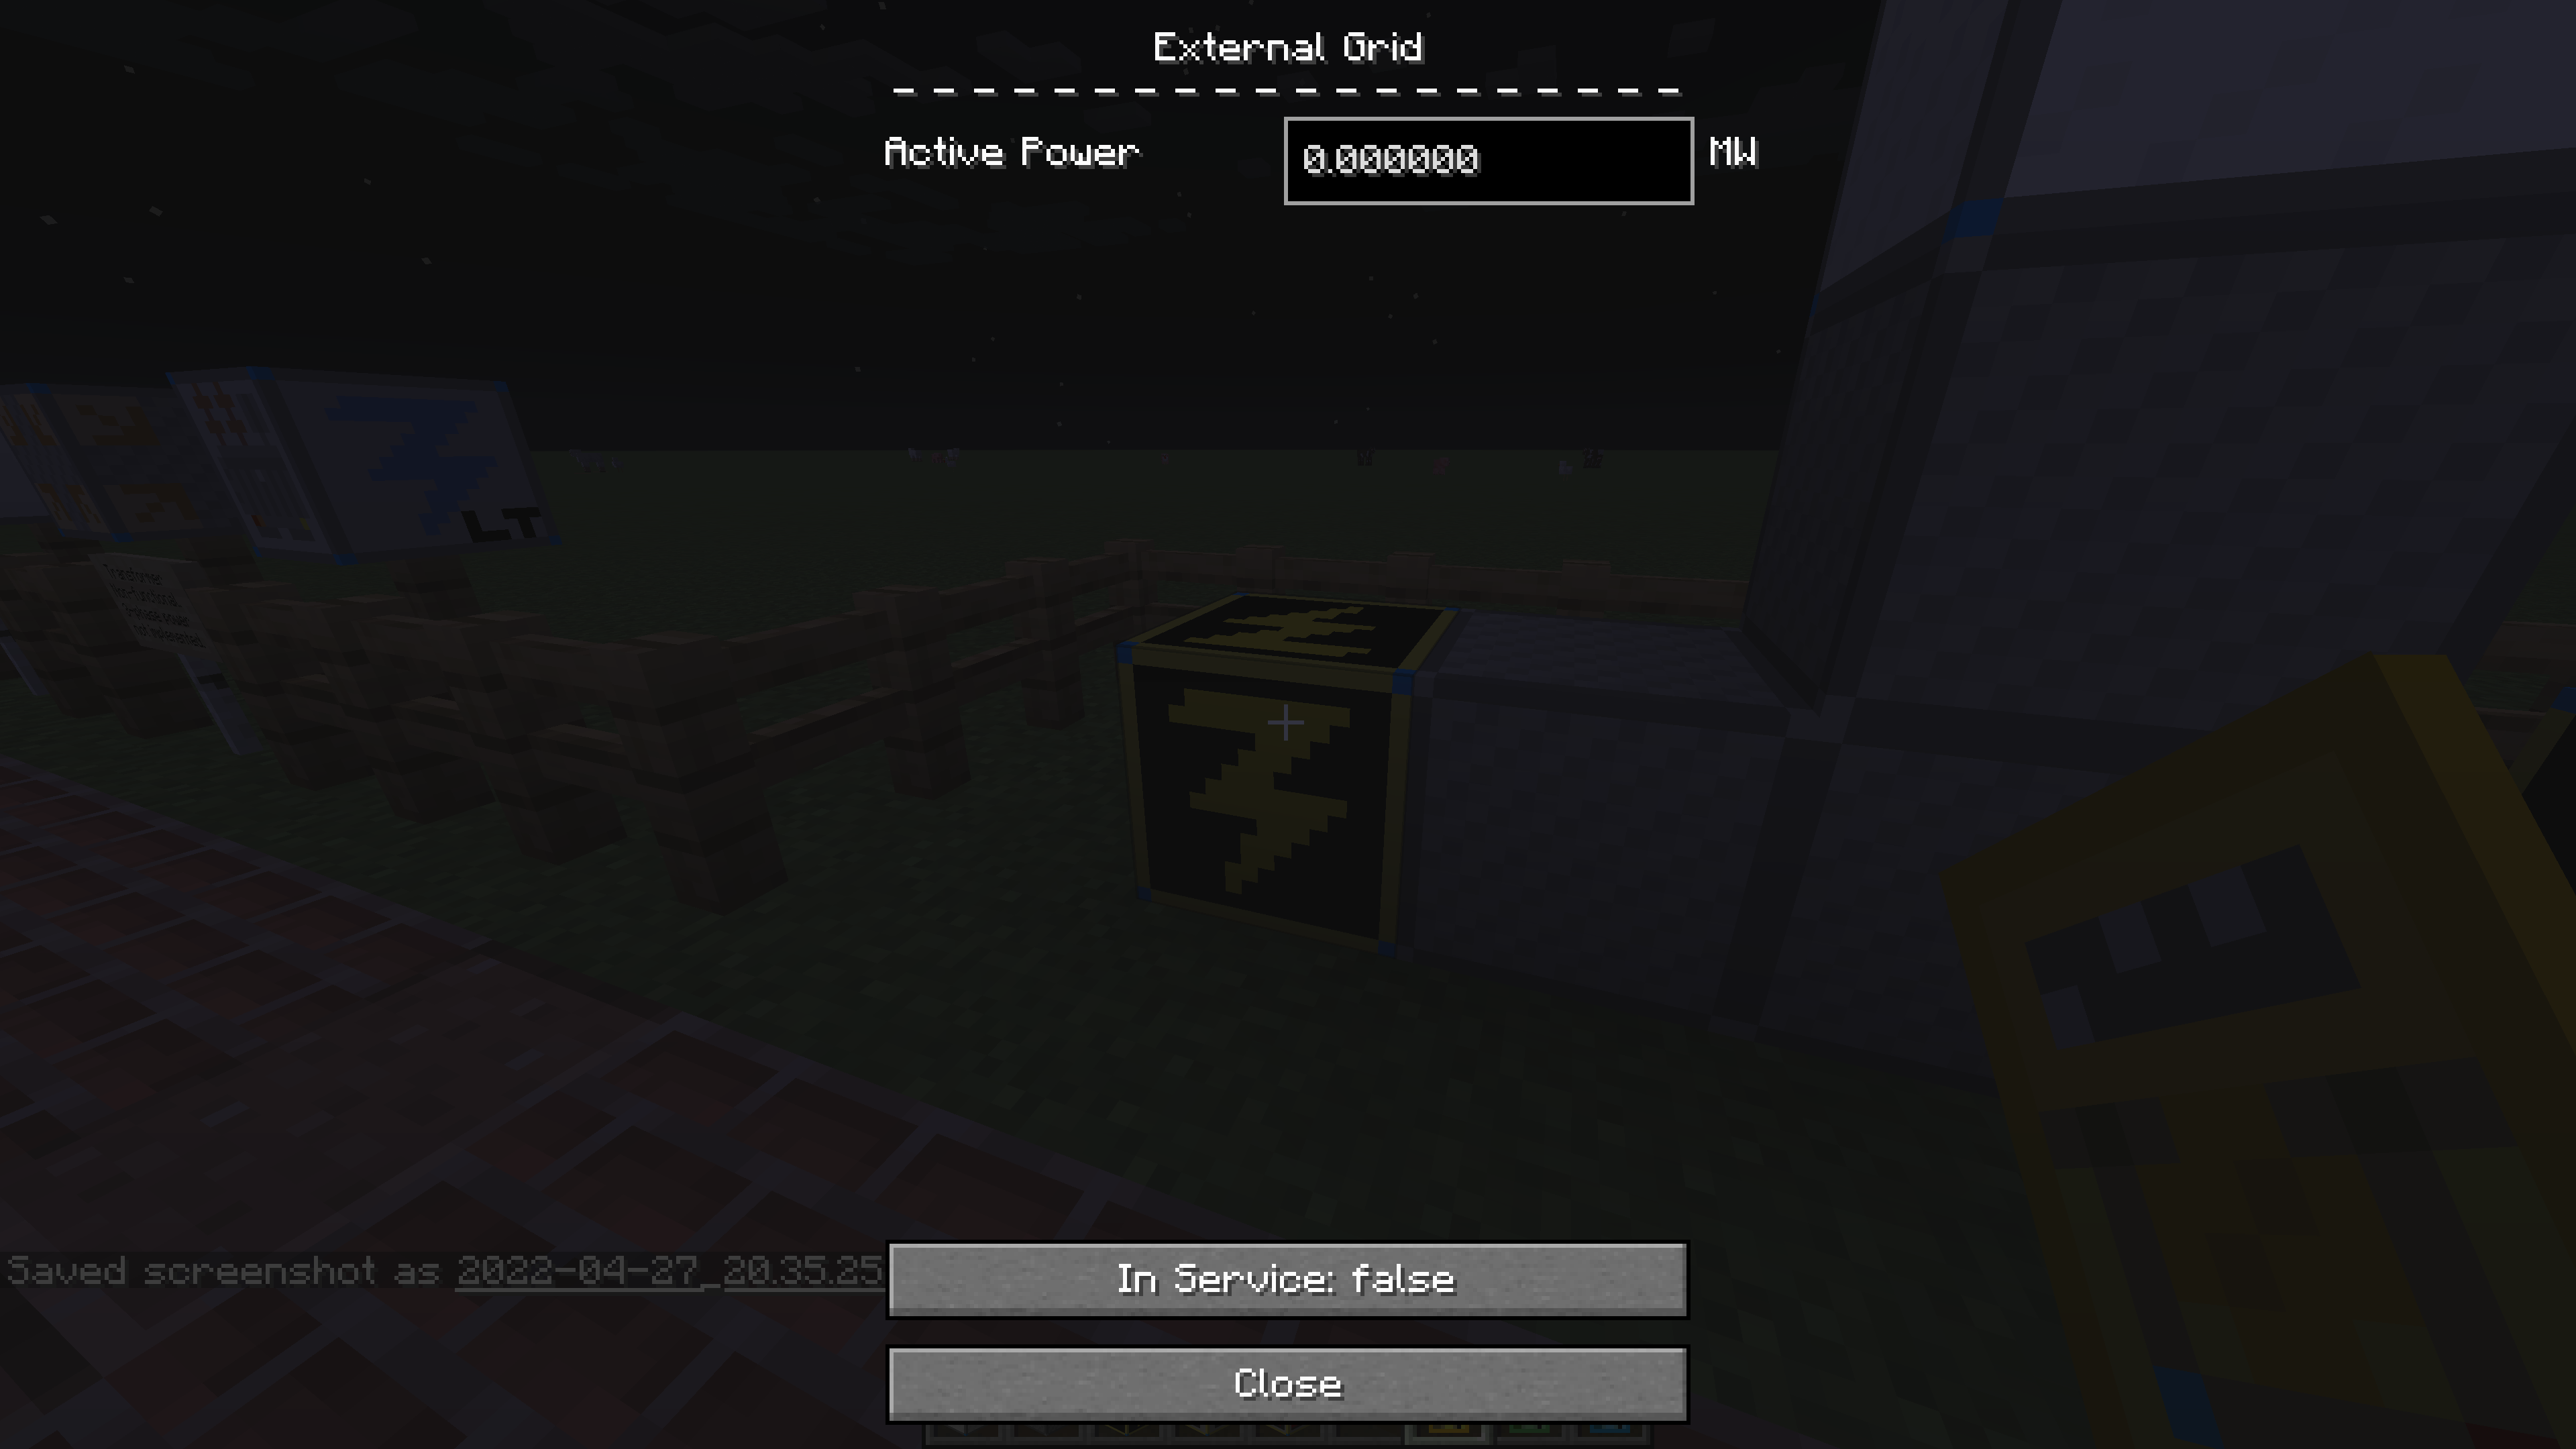
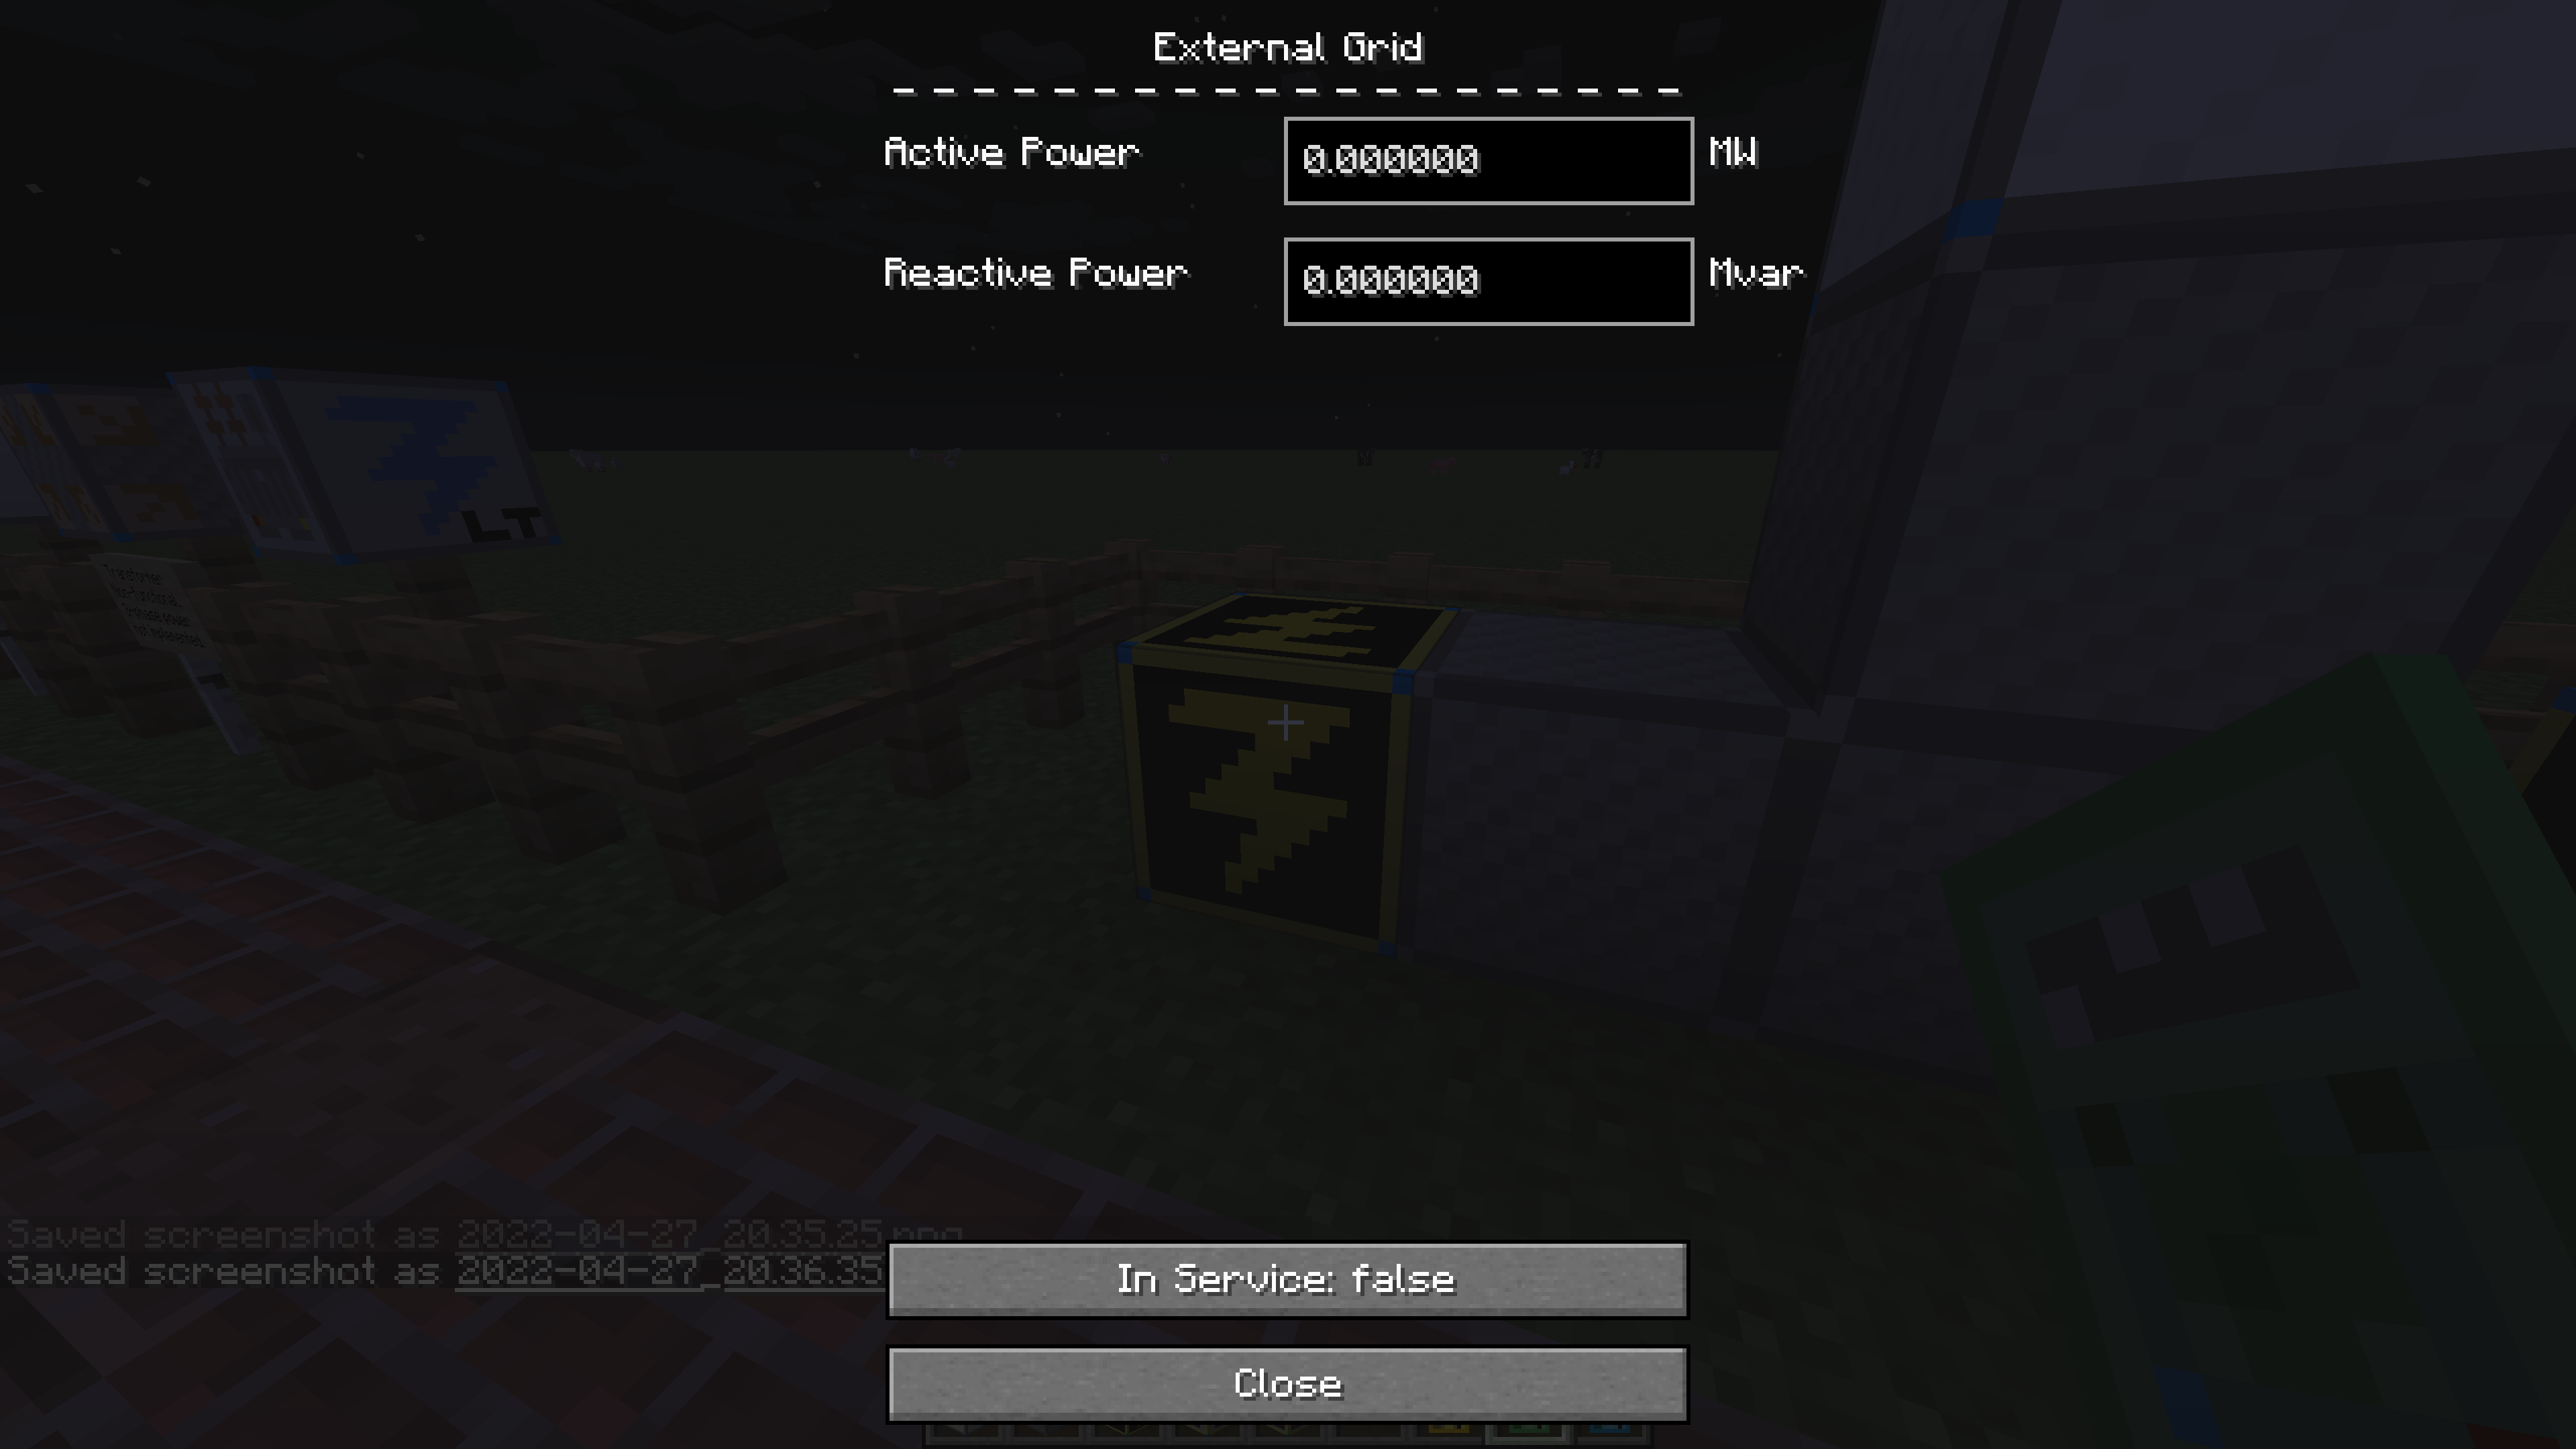
Certain blocks may display more information with the Intro Multimeter depending on their function. For example, the Battery block necessarily displays Maximum Energy and Charge Percent values.
For the purposes of this usage guide, we’ll be using the Advanced Multimeter. When holding the Multimeter, you can perform two different actions. Left clicking on a block with it will toggle it on or off. Right clicking a block allows you to view and modify the block’s values through a GUI.
Toggle (Left Click)
Each block (excluding wires) has a variable called In Service which indicates whether or not that particular block is enabled. Left clicking on the block will toggle this value and request a new simulation. This function is like flipping a light switch.
Below is a demo showing this feature in action. At the start of this clip the lamp is turned on, but the external grid is turned off. This means the lamp is ready to receive power but isn’t supplied any. When the external grid is left clicked, it is toggled into the enabled state and the lamp now receives power. After this, we left click on the lamp again to turn it off. While the external grid is on and capable of sending power, the lamp is off and so will not utilize any power.

Interact (Right Click)
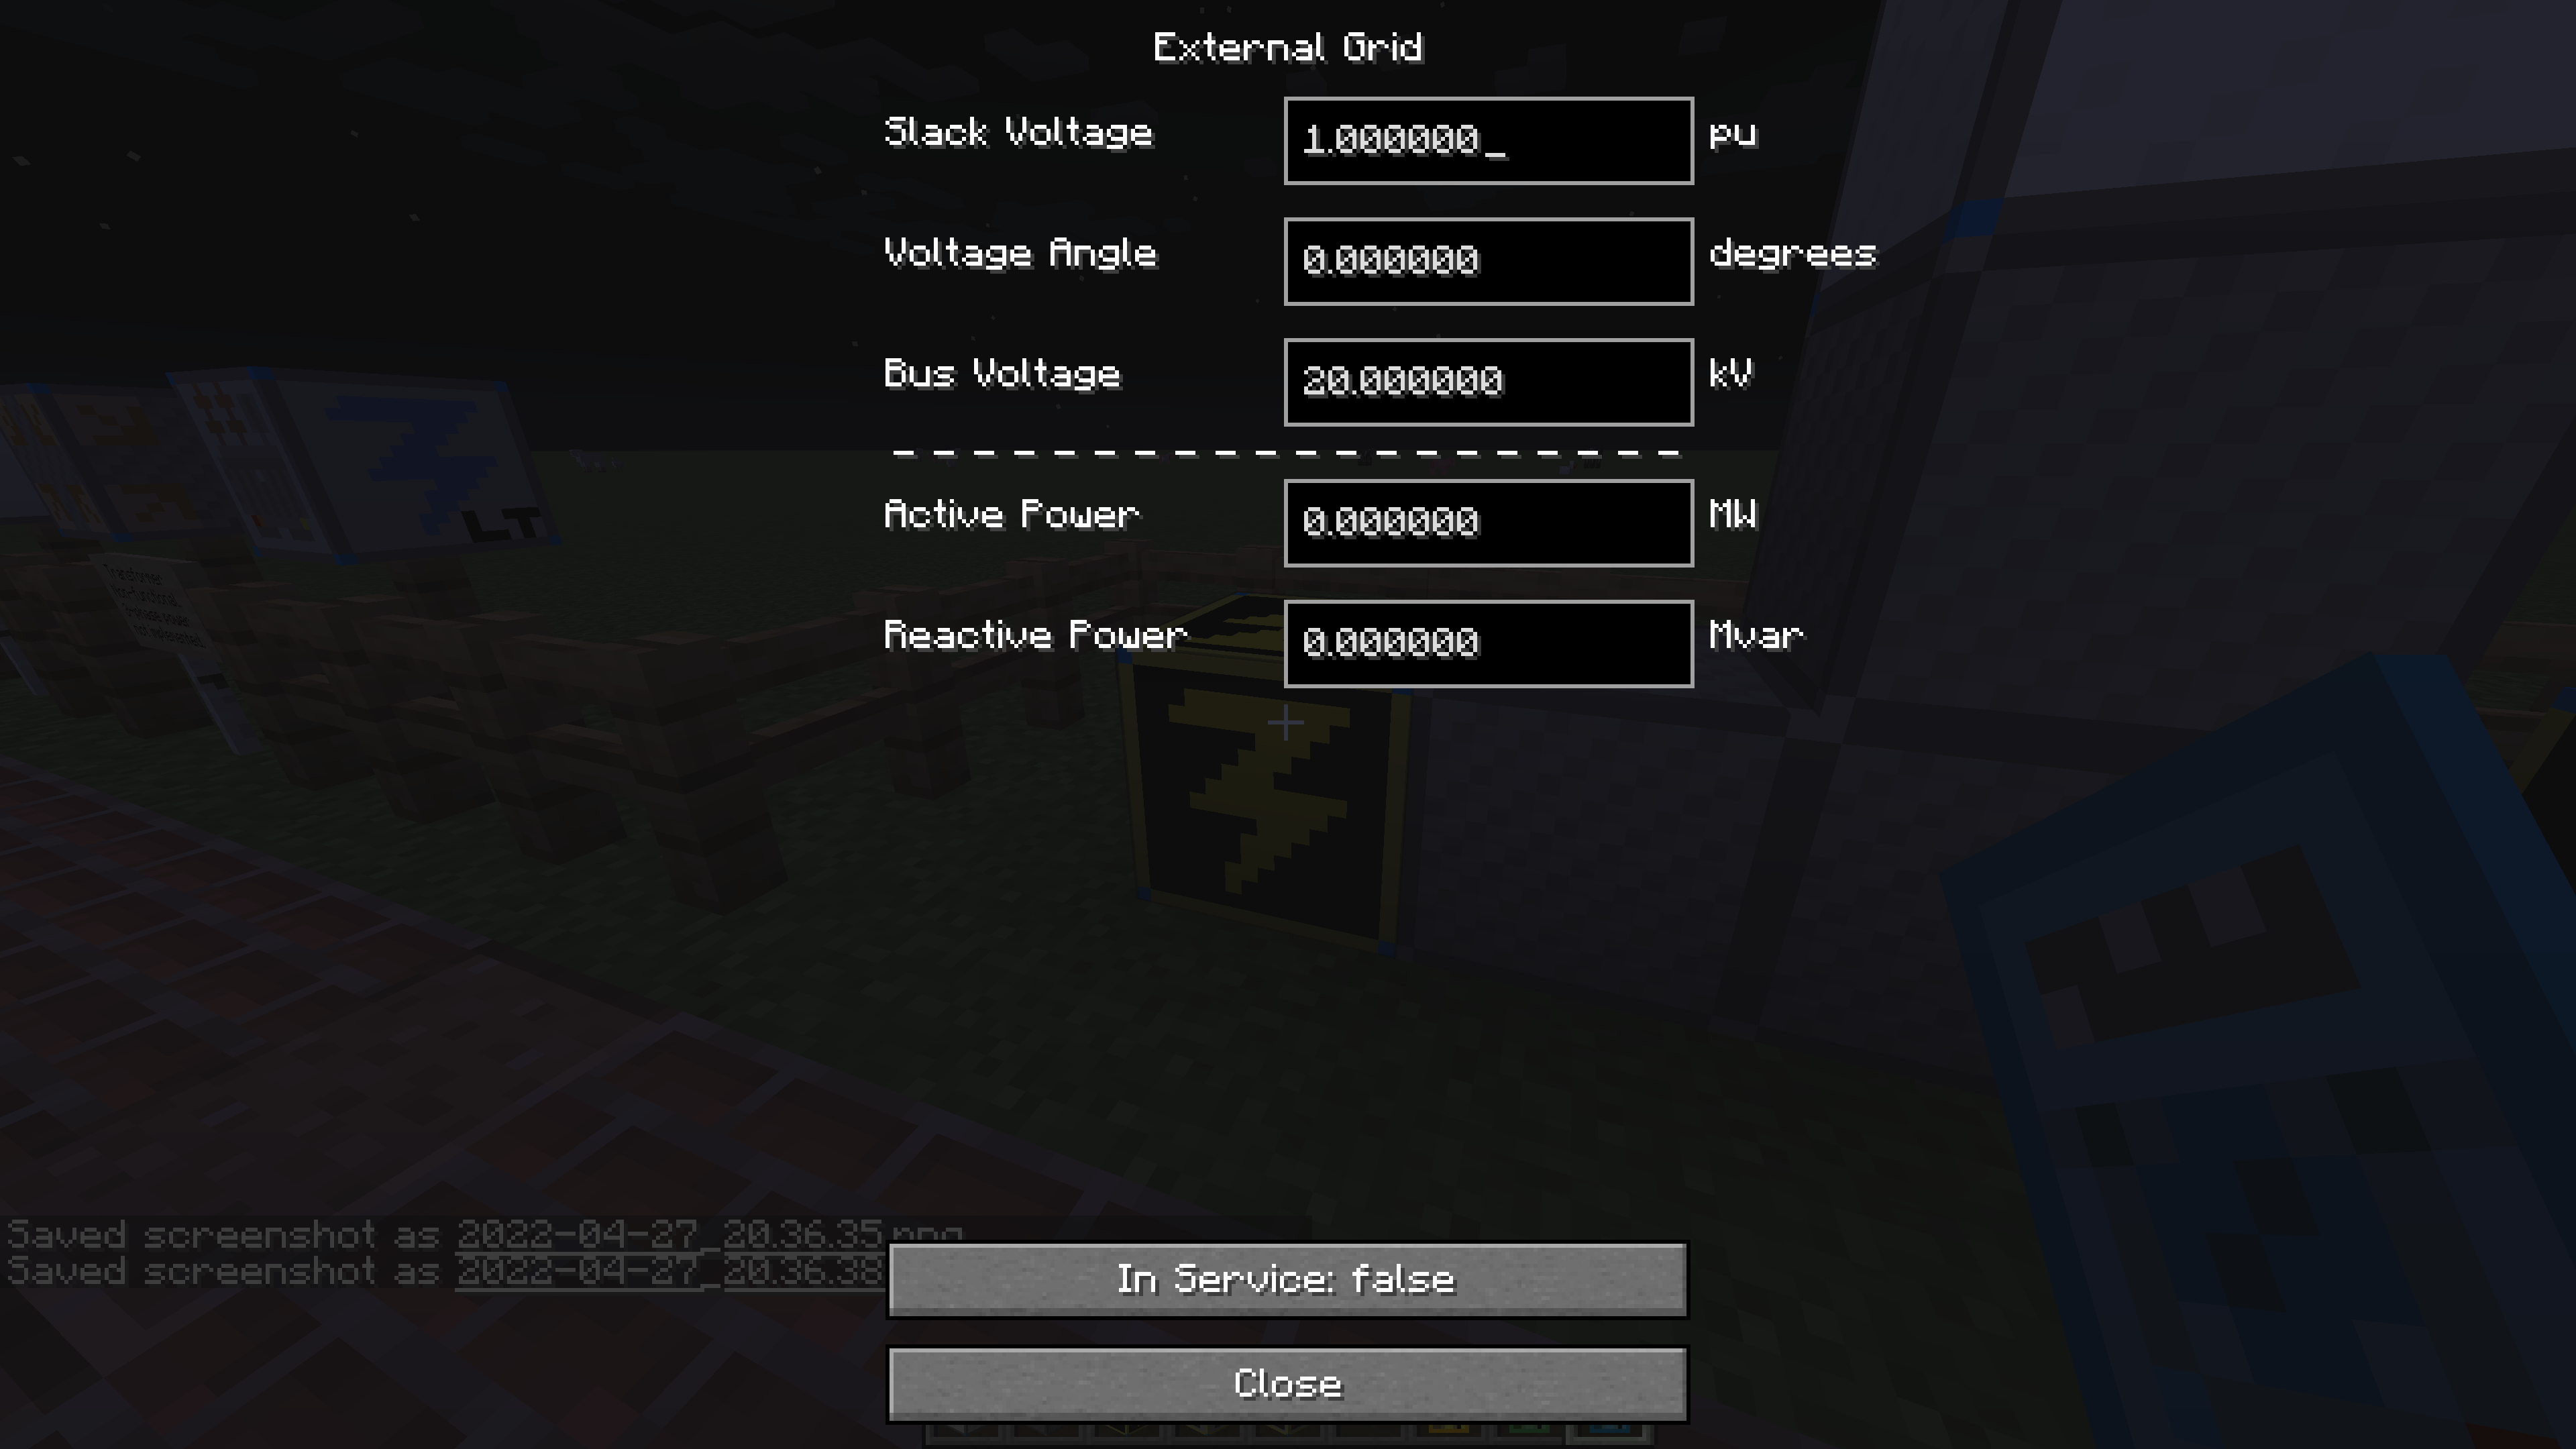
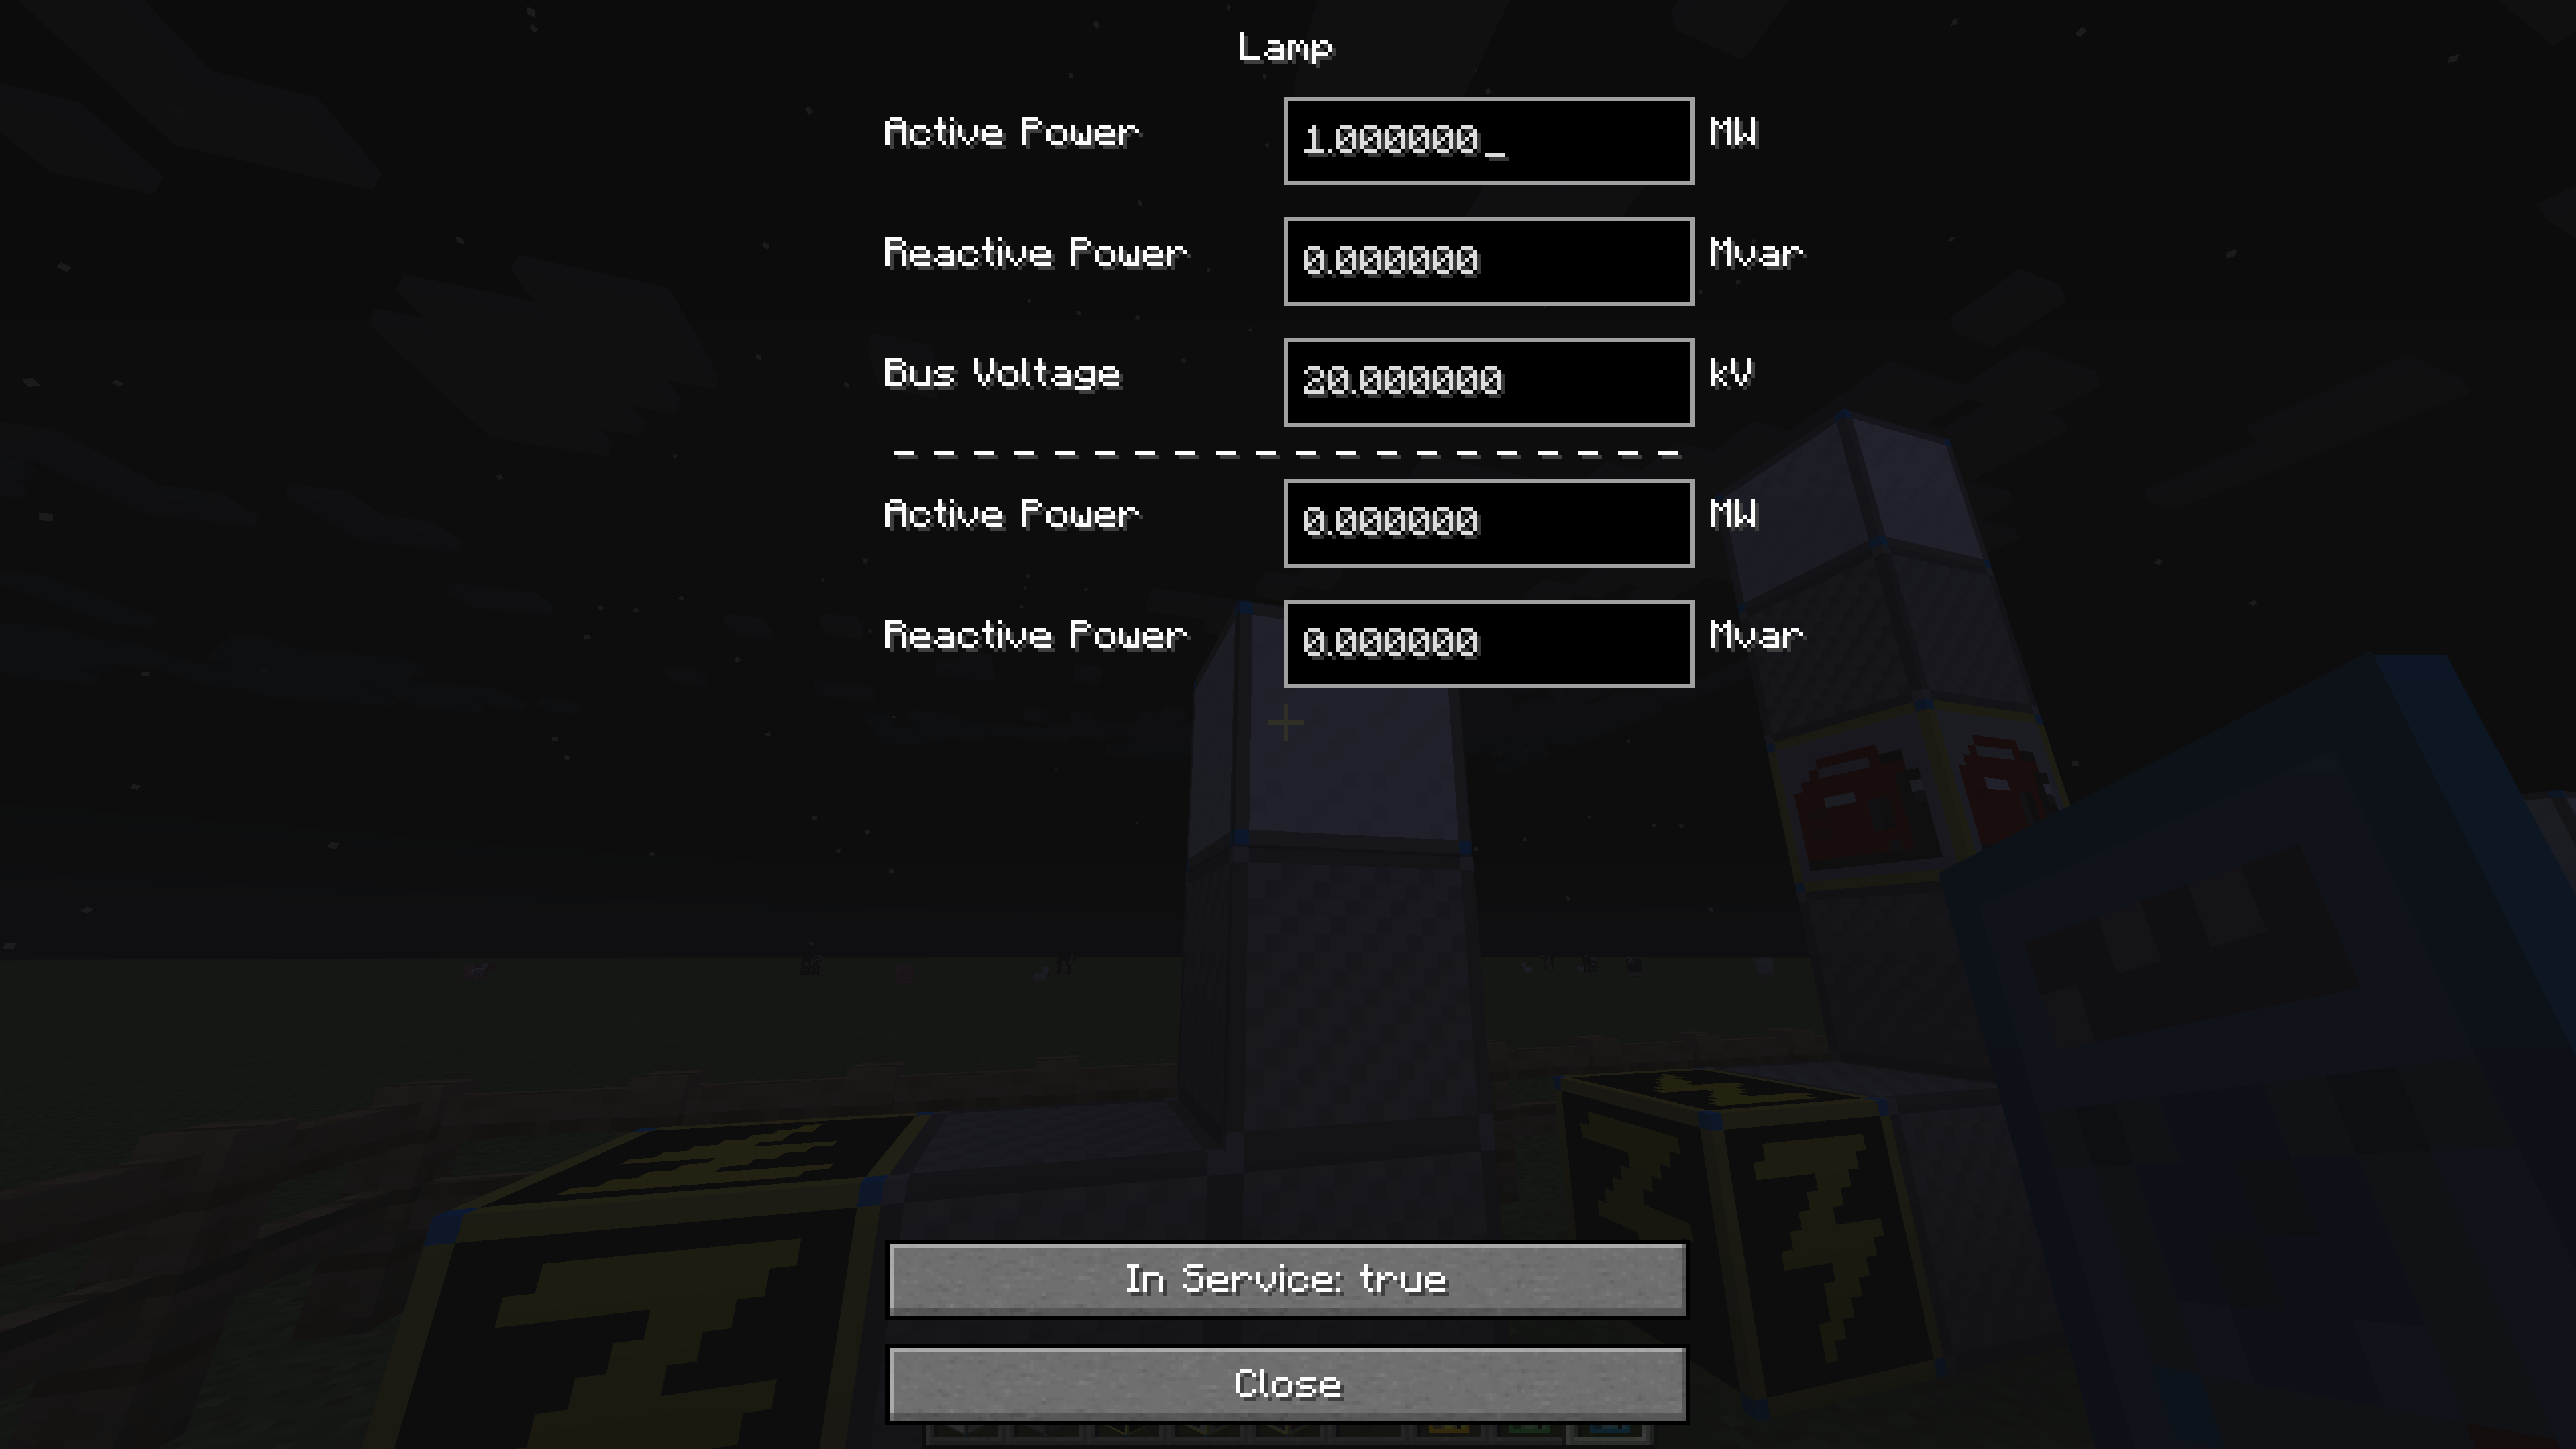
All blocks, except wires, have specific inputs and outputs such as voltage, wattage, etc. Right clicking on the block will open up the specific GUI for that block. This menu allows you to set the inputs, view the outputs, and request a simulation for the network that block is in. Here is an example of what the GUI looks like for an External Grid block:
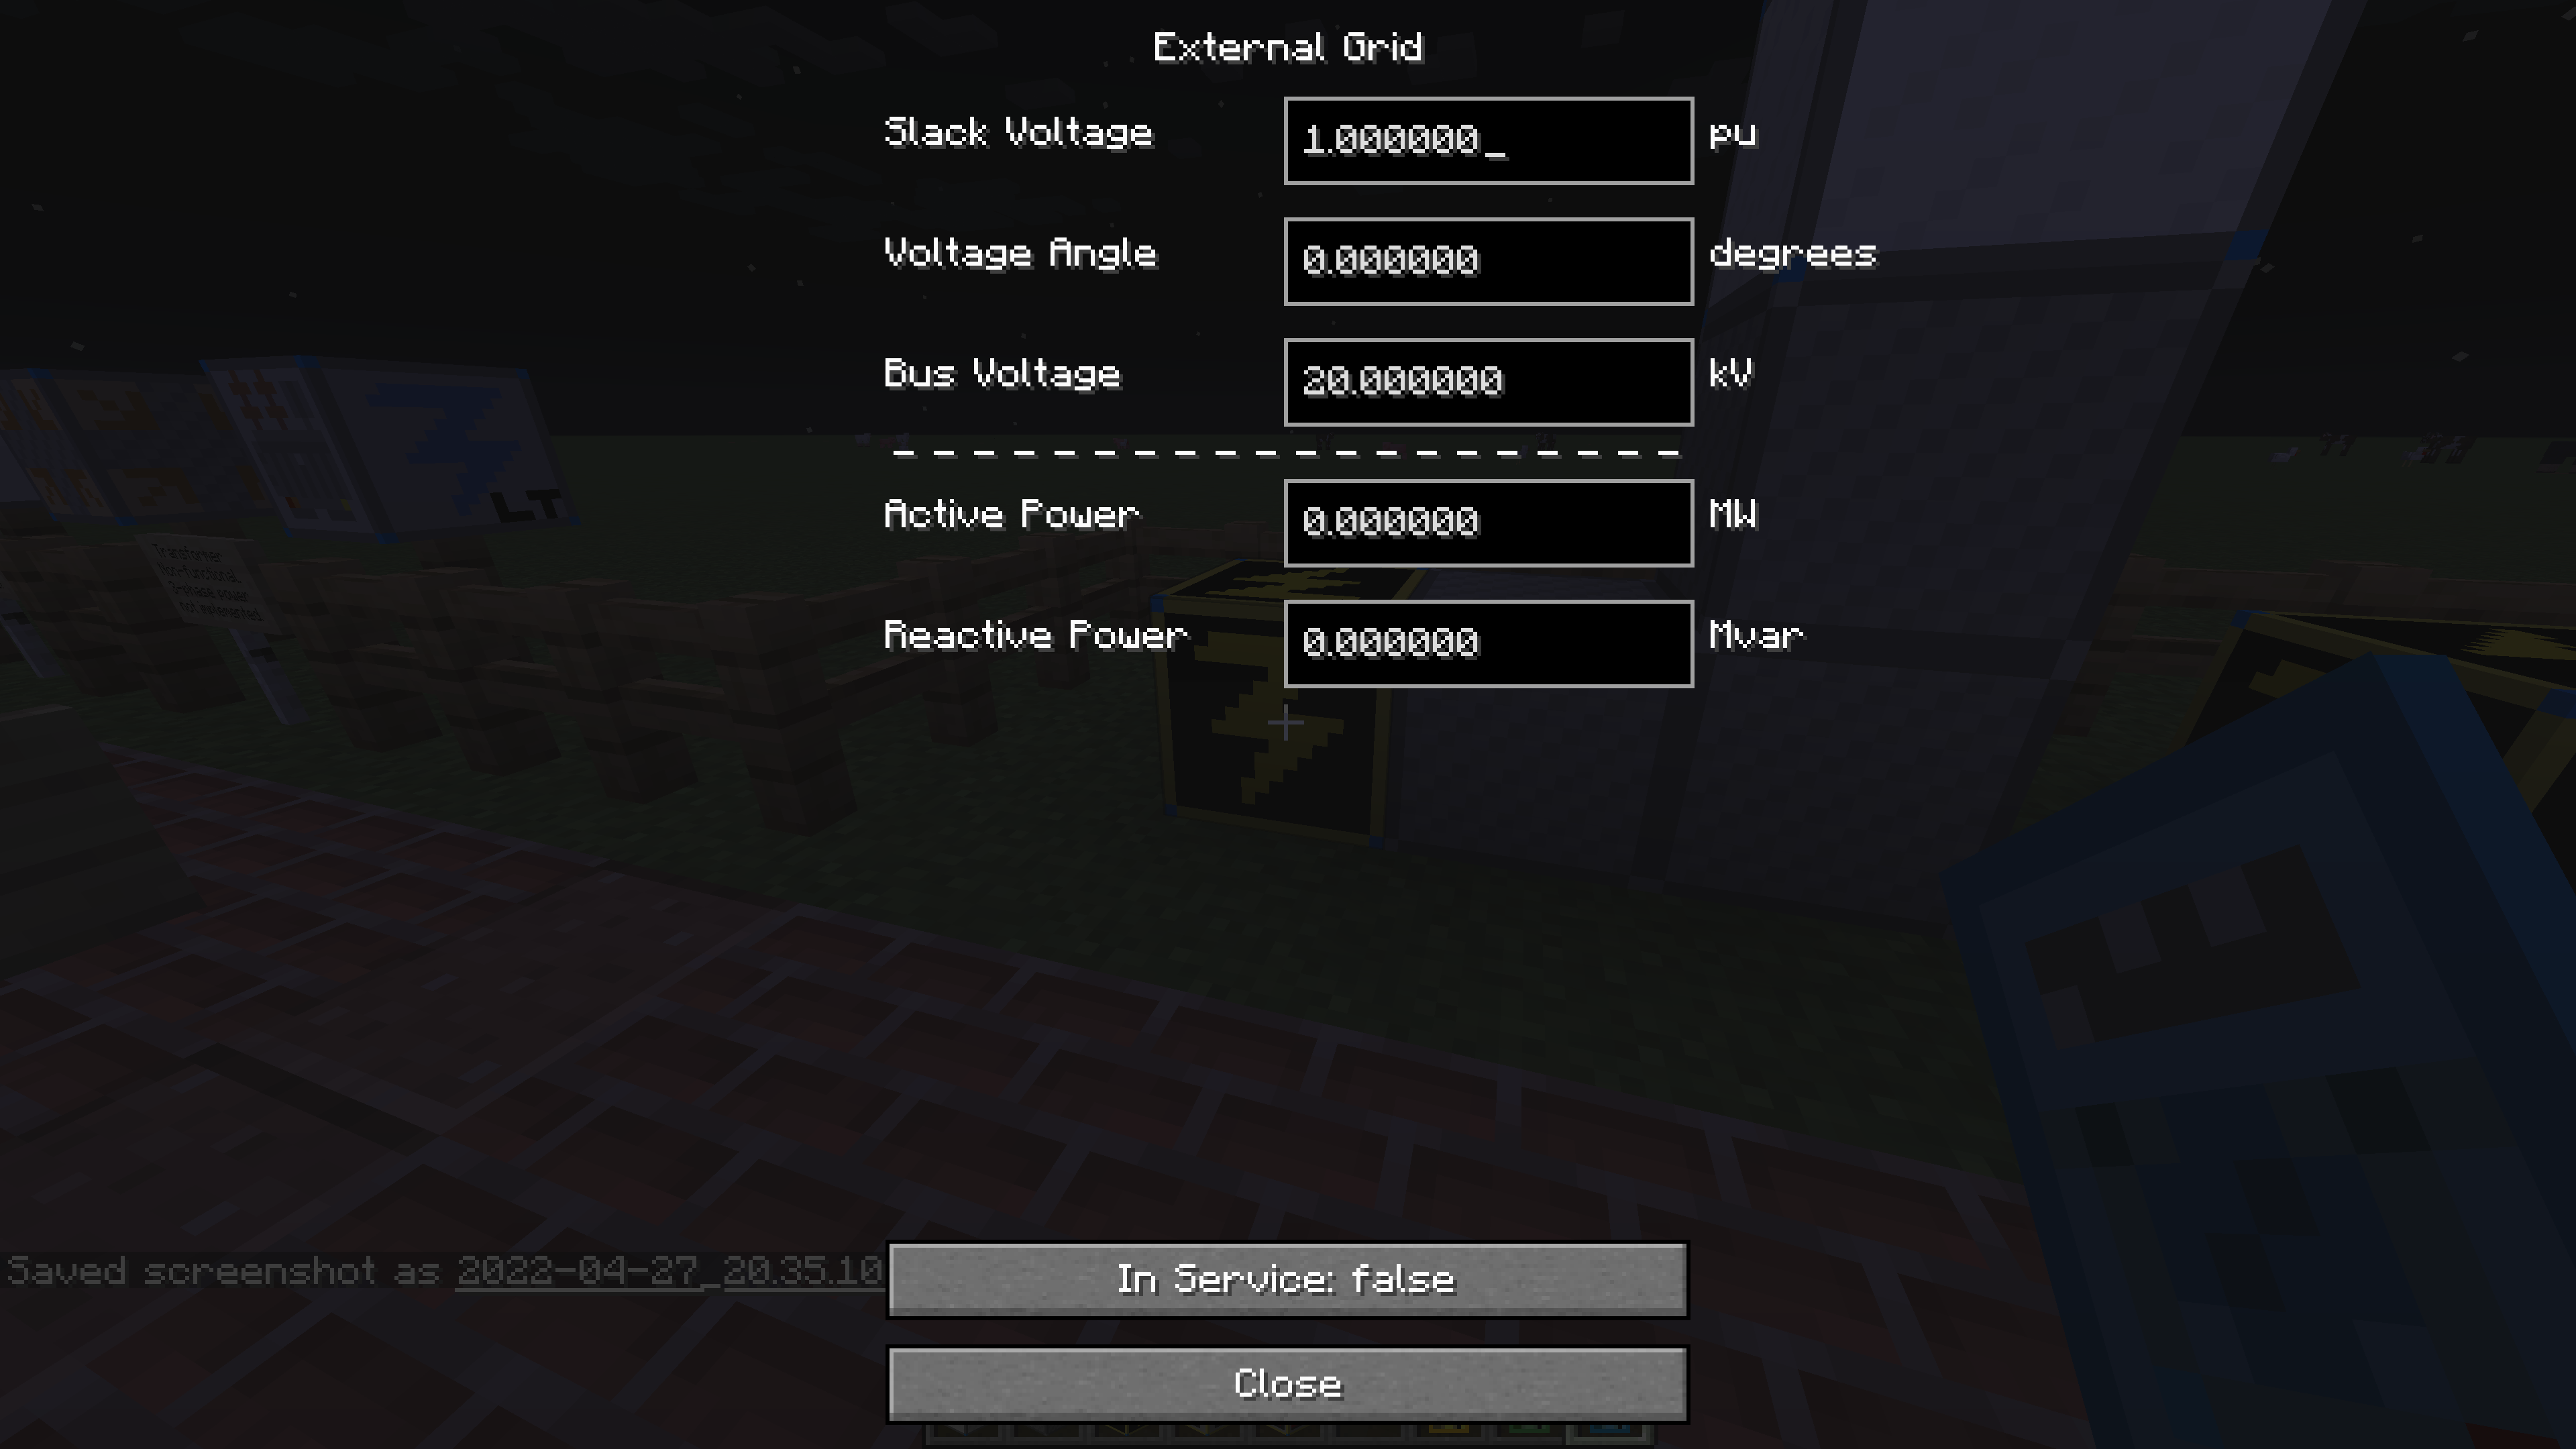
Below the name of the block is a list of all the inputs and outputs for it. The inputs are at the top of the list, separated from the outputs below by a dashed line. Each entry in the input or output contains a label, a field for the numeric value, and the units of measure. At the very bottom are two buttons. The top button toggles whether or not the current block is enabled or not (the same as if you left-clicked it with the multimeter). The bottom button will submit any changes made and close the GUI. Here is an example of a different block:
As you can see, the specific inputs and outputs are different, but the fundamental layout is the same. Whenever you open up a GUI, you can close it by either hitting your escape key (ESC) or by clicking the Done button. If you press escape, any changes you made will be discarded and no simulation updates will occur. If you hit the Done button, a simulation will only occur if you made changes to the inputs or the In Service status. The text of the bottom button will change depending on whether or not a change was made. Here is a demonstration of GUIs in action:
The lamp block is right-clicked to pull up the GUI. The block currently has Max Power set to 0 and In Service set to false. The lamp is off and unpowered in its current state. You can see this in the outputs. The Result Power field is 0 and the Light percentage is not a positive value. We want to change this though. The Max Power input is set to 0.1 MW, the In Service button is toggled to true and the submit button is pressed to close the menu.
Once the menu is closed, a simulation request is processed. We right click on the block again to pull up the new information. As you can see, the outputs have now been updated indicating the lamp is now powered and working!